Some people say not to buy one of these, but to save up and get a "real mill" with a knee. It is the mother of all drill presses, and an adequate mill. However, it is much better than no mill at all, and you would only sell it to move up to something better.
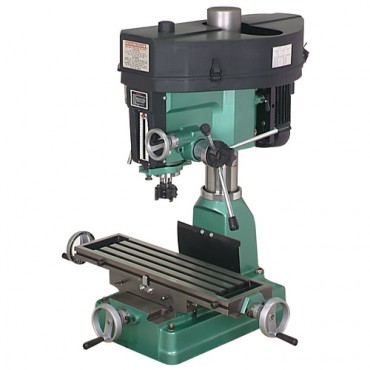
In late October of 2010, I purchased a Harbor Freight Mill/Drill. Mine is labelled model T-2119 / 9970, made in Taiwan. It looks identical to the current offering which is item 33686. The 33686 sells for $1200 in 11/2010.
Their manual doesn't tell me a thing about lubing the spindle. One forum post suggested that the spindle taper sleeve (HT part number 6, Grizzly part number 306) would benefit from a regular packing of grease (maybe monthly, takes 10 minutes).
Apparently it is fairly common for an index pin (like a single roller from a roller bearing) to get lost that locks the R-8 spindle collet. It is behind a metric set screw on the side of the spindle. You tram the head by putting shims under the base to column mounting, and this is only good at one head height. The column flexes, so keep the head as low as possible. Take light cuts. The machine should sound like it is not even cutting, when it is cutting. If you hear clunk, clunk - stop and change how you are doing things. Short drill bits (for screw machines) are a big help with limited Z motion on this mill.
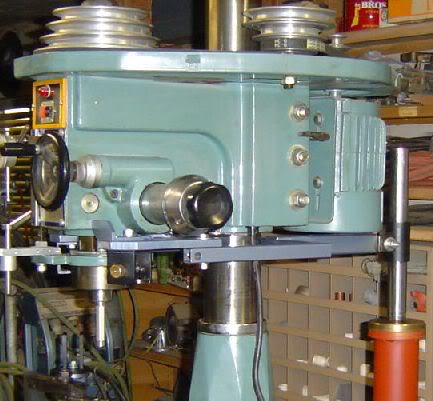
To get to the spindle bearings, you do not need to remove the top pulley. Just remove the handle and fine feed housing to access the pinion gear. Be sure to lock the spindle before you remove the pinion gear or the spindle will fall out unexpectedly. There is no way to get grease into these bearings other than taking the machine apart.
Power twist belts are recommended to greatly remove vibration at the top three speeds.
I have found that changing speeds is a big hassle. My mill has a B-41 belt in the front and a B-34 in the back. This set up is so tight that the motor pivot serves no pupose at all. I tried changing to a B-42 belt in front, but this allowed the idler pulley to move too far to the rear and the front belt would have rubbed the column. I intend to try a B-35 in the back and see if that gives the motor some slack. Interestingly the Harbor freight parts list shows a B1016 or B1041 in the front (these are identical to the inch-measured B40 and B41) and a B813 in the back. The B813 is identical to a B-32, which would be hopelessly tight! The grizzly manual specifies a B-42 in front and a B-34 in back - this is why I tried the B-42, but it did not work. I am optimistic about trying the B-35. If that doesn't work I am going to modify the motor mounting plate.
One fellow said that he had trouble getting the head reliably tightened on the column until he replaced the two bolts with quality grade 8 bolts. After that: no more problems.
A problem with all round column mills, is that you loose your zero and need to square the head each time you raise or lower the head. This problem is compounded by the fact that mills are short and drills are long, so it can be impossible to mill then drill without raising or lowering the head. An attachment may exist to extend mills to the same level as a drill, and some people are happy with these.
Harbor Freight technical support (1-800-444-3353 or 1-888-866-5797) are in general clueless. What you can do is to call Grizzly and tell them (lie to them) that you bought a used G1006, which is apparently the same item and get real information.
The Grizzly G1006 sells for $1195 in 11/2010, and looks like the same item. The Grizzly G1007 sells for $1500 in 11/2010, includes power feed on the longitudinal axis.
There is also a company called "Jet" that may market a mill essentially identical to the G1006, but I have not pursued this.
Harbor Freight adds $90 in freight charges, and Grizzly adds $144. Maybe you could avoid these if you found one already at your local store. Both Grizzly and Harbor Freight throw in a drill chuck, a fly cutter (really a milling head), and an angle vise.

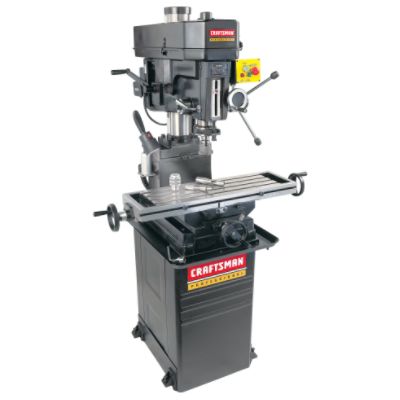
Sears offers pretty much the same item, albeit for double the price ($2300 in 11/2010). The extra $1000 gets you the Sears label, along with the word "Professional".
The generic item from Taiwan is the Rong Fu "RF-30".
It looks like this:
Grizzly Mill/Drill Model G1006 - November 1991
Disassembly sequence longitudinal table (X Axis)
Disassembly sequence cross table (Y Axis)
Milling head removal
Base and column
Use steel plate 4"x4"x1/2" with 3/8" threaded hole. Drop plate through slot in base, screw in solid eyebolt and attach lift chain. Position eyebolt close to column for lift and strap lift chain to top of column, as assembly tends to tilt away from vertical chain.
Motor connections and data
For 115 volts, single phase
1,3,5 to top
2,4,6 to bottom
Results in clockwise rotation, facing end of shaft.
For counterclockwise rotation, switch 5 and 6 (green wires)

For 230 volts, single phase 1 to top
2,3,5 connected together
4,6 to bottom
1 1/2 HP - 11 amps, 230 volts. Use dual element fuse @ 15 amps or Circuit breaker @ 20 amps
About four years ago my mill started making unruly noises that I confidently identified as quill bearing failure. I disassembled the quill, pulled the bearings and spent $60 on a pair of new ones from a local bearing purveyor. The noise wasn't a bad bearing. Why this happened in this sequence escapes me now but I then discovered that the problem was a loose setscrew in the pulley.
I decided to install the new bearings since they were U.S. and I trusted them better than the originals even though there was nothing wrong with the originals. I removed the dust cover on one side of each bearing race and drilled and tapped the Mill Head Body for a 1/8"-27 tube fitting. I piped it out from under the top pulley and through the side of the lower belt guard to a Zerk grease fitting. I reassembled the bearings with the open sides facing each other and filled the space between the upper and lower bearing races with Lubriplate. Now, if I wish, I can re-lube them when the spirit moves me.
Coincidentally, the setscrew has never loosened again
Tom's home page / tom@mmto.org