I will call this "the STM32" in what follows, since calling it "the STM32F103C8T6 ARM STM32 Minimum System Development Board" quickly becomes tedious. I may also call it the "blue pill".
While you are at it, buy a half dozen CP2102 or CP2104 USB to serial devices. These usually cost about $1.00 and will be useful and necessary when you want a serial console.
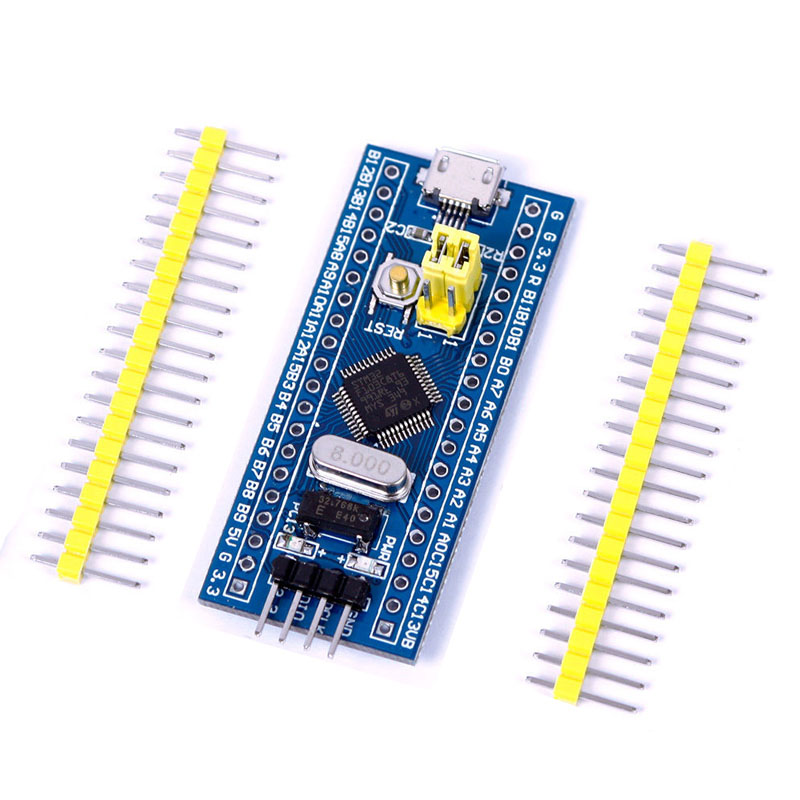
Check that both jumpers are on "0" and leave them there. Forever!
Now just for fun, scrounge up a micro USB cable and plug it in. This is only to supply power and see what happens. Mine lights up the Red LED (which is a power LED) and starts blinking the green LED. But on some of my older units, it is the other way around, the green LED lights up (and it is the power LED) and the red LED starts blinking. So it shipped with some kind of blink demo installed. This can be good or bad. Sometimes they load the blink demo and also blow a security fuse. If so it is a hassle, but we are getting ahead of ourselves.
I should note that this is how I like to do things. An alternative way is to use some kind of boot loader (which you have to burn into the unit somehow) and perhaps even the Arduino IDE. I have no interest in any of that. I use Makefiles, a C compiler, and do what many people call "bare metal" programming. To each his own. It takes all kinds to make a world.
The ST-Link has a USB connector on one end, and 10 pins on the other end. We are going to use 4 of those 10 pins to connect to the 4 pins on the end of the STM32 opposite the USB connector. The ST-Link usually comes with a little cable, but if not you will have to scrounge up a 4 conductor cable, female on each end. You want to connect SWCLK, SWDIO, Ground, and 3.3 volts. They are NOT in the same order on each device, so pay attention and get this right. I also avoid having the ST-Link and a USB cable both connected, that would power the device from both USB and from the ST-Link, and might not be good.
dnf install openocdInstalling the cross compiler and toolchain is equally easy:
dnf install arm-none-eabi-gcc-cs

(1/2): arm-none-eabi-binutils-cs-2.25-3.fc24.x86_64.rpm
(2/2): arm-none-eabi-gcc-cs-5.2.0-4.fc24.x86_64.rpm
git clone https://github.com/trebisky/stm32f103.git
cd stm32f103/blink2
make
make flash
When I did this on some recently purchased units, I ran into trouble. See my "problems" section.
When I do this on one of my old reliable units, I see the following:
make flash openocd -f /usr/share/openocd/scripts/interface/stlink-v2.cfg -f /usr/share/openocd/scripts/target/stm32f1x.cfg -c "program blink.elf verify reset exit" Open On-Chip Debugger 0.10.0 Licensed under GNU GPL v2 For bug reports, read http://openocd.org/doc/doxygen/bugs.html Info : auto-selecting first available session transport "hla_swd". To override use 'transport selectAnd my blink2 demo is flashing away. It blinks 3 times, then there is a longer pause. This allows you to distinguish it from the blink demo that is sometimes shipped in the unit.'. Info : The selected transport took over low-level target control. The results might differ compared to plain JTAG/SWD adapter speed: 1000 kHz adapter_nsrst_delay: 100 none separate Info : Unable to match requested speed 1000 kHz, using 950 kHz Info : Unable to match requested speed 1000 kHz, using 950 kHz Info : clock speed 950 kHz Info : STLINK v2 JTAG v21 API v2 SWIM v4 VID 0x0483 PID 0x3748 Info : using stlink api v2 Info : Target voltage: 3.182505 Info : stm32f1x.cpu: hardware has 6 breakpoints, 4 watchpoints target halted due to debug-request, current mode: Thread xPSR: 0x01000000 pc: 0x08000052 msp: 0x20005000 ** Programming Started ** auto erase enabled Info : device id = 0x20036410 Info : flash size = 64kbytes target halted due to breakpoint, current mode: Thread xPSR: 0x61000000 pc: 0x2000003a msp: 0x20005000 wrote 1024 bytes from file blink.elf in 0.098073s (10.196 KiB/s) ** Programming Finished ** ** Verify Started ** target halted due to breakpoint, current mode: Thread xPSR: 0x61000000 pc: 0x2000002e msp: 0x20005000 verified 352 bytes in 0.022623s (15.195 KiB/s) ** Verified OK ** ** Resetting Target ** shutdown command invoked
Also there are reports of different kinds of chips being installed in what look like the same old "blue pill".
I have another page elsewhere that discusses both of these issues.
Tom's Computer Info / tom@mmto.org