First experiments with DCRAW 8.11 (Oliver)
OK, now it is time to play a bit. I have taken 678 photos with my Canon 20D, just using
the highest quality .jpg mode, but this morning I took my first image with the camera in
RAW mode (and also saving a high quality .jpg file). Then I pulled the image off the
flash card and tried to figure out what to do with that .cr2 file. Here we go!
Note that these were done with dcraw version 8.11 before the semantics of the -n option
was changed (these days with version 8.21 and later the -n switch should just be omitted).
The play by play with dcraw versions so far is:
- 6.35 (ships with fedora core 4 in /usr/bin).
A nice result, a bit more red that 8.11
- 8.11 (results as below, I like this version)
less red and more green than 6.35.
- 8.21 produces something very dark and underexposed looking.
(downloaded 6-13-2006).
Dcraw takes in a raw file and generates an 8 or 16 bit PPM.
The following pipeline will generate a JPEG file.
dcraw -c oliver.cr2 | ppmtojpeg >oliver_1.jpg
The camera spits out a 3504x2336 pixel .jpg file. Using the above pipeline with
dcraw and ppmtojpeg, I get a 3520x2346 pixel .jpg file (ooh! extra pixels).
I then use image magic "convert" to make a 480x320 jpg to give you something
to inspect on this web page.
This picture of Oliver was taken with natural light (coming in from a north
facing door at the left of the photo), and no flash. The raw file (img_0679.cr2)
is 7.04 megabytes in size, and the high quality JPEG file is 820k.
Wow! I thought the big JPEG files were eating up my disk space.
On my dual 1Ghz Pentium III system, the following conversions take about
20 seconds each. The last takes only 8 seconds or so when the -h option
is used.
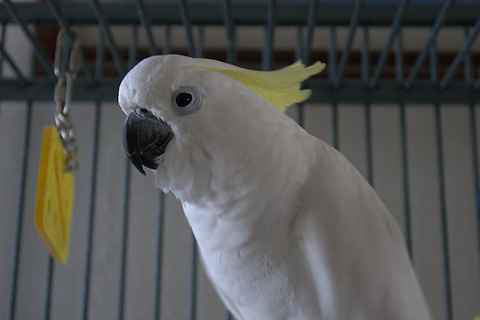
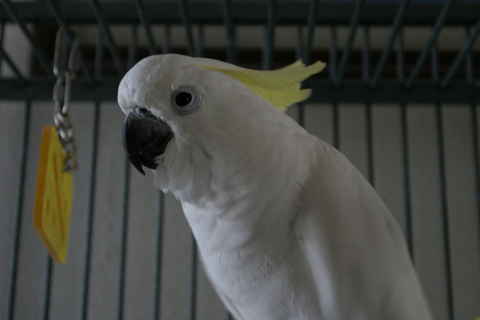 Here is the cameras .jpg file "as is".
It looks horribly underexposed, and indeed, it turns out the camera
still has -1 stop of exposure compensation from the sunset shots
I was taking last night. This adds an extra wrinkle
which is instructive all in itself.
Here is the cameras .jpg file "as is".
It looks horribly underexposed, and indeed, it turns out the camera
still has -1 stop of exposure compensation from the sunset shots
I was taking last night. This adds an extra wrinkle
which is instructive all in itself.
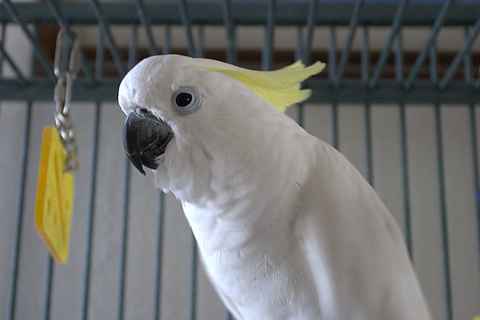
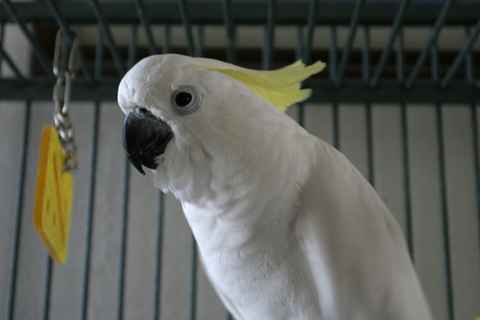 Here is the cameras .jpg file after I adjusted the
white point in GIMP to compensate for the underexposure.
Here is the cameras .jpg file after I adjusted the
white point in GIMP to compensate for the underexposure.
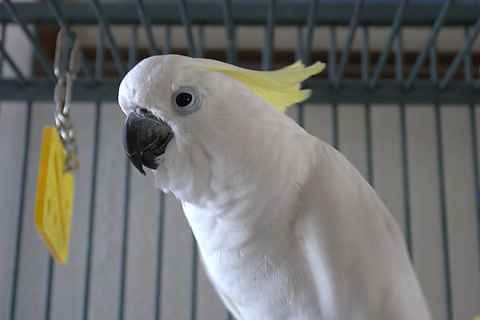
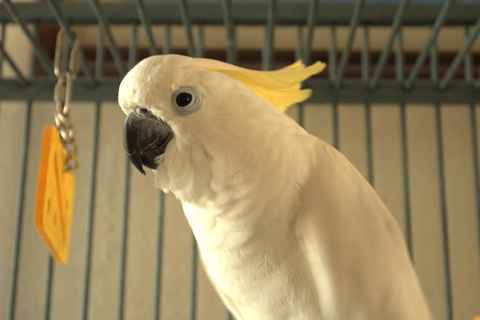 Here is what I get from dcraw -c
(all that -c does is send the output to stdout).
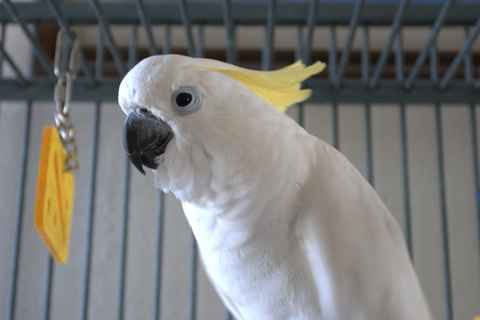 Here is what I get from dcraw -a -c
(-a tells dcraw to use auto white balance)
 Here is what I get using dcraw version 8.11 with the old -n switch
dcraw -a -n -c
(-n tells dcraw not to clip colors)
 Here is what I get using dcraw version 8.23 with the new -n switch
dcraw -a -n -c
This has gotten dark and other images get darker and purple,
so the -n switch is to be avoided now without further study.
 Here is what I get using dcraw version 8.23 with the switches:
dcraw -a -c
 Here is what I get from dcraw -a -n -h -c
(-h tells dcraw to generate a half size color image, which is a
lot faster, but gives me 1761x1174 pixels instead of 3520x2346 pixels)
Again, this is version 8.23.
What can we learn from the above?
First, use the -hswitch to save time when I need final images for the web
(or anything less than 1762x1175). Second, avoid the -n switch until I
understand it's new meaning, and in that case probably use -H 2-9 instead.
Above all I will feel comfortable just taking
raw images and knowing I have a path to create decent jpeg files. I notice that all
the EXIF data vanishes (at least it doesn't make it to the .jpg files generated by
the above process), so I may want to at least have the camera save small low quality
.jpg files to serve as thumbnails and carry the EXIF data. It is all there in the
.cr2 file though and there are ways to get at it.
It
has been claimed
that by default DCraw clips the highlights, although a command line switch turns this off,
however the gimp plugin doesn't have the switch and always clips.
This claim was made back in May 2005 about an unknown version of dcraw, so this may or may not
still be an issue.
Feedback? Questions?
Drop me a line!
Uncle Tom's Digital Photography Info / tom@mmto.org