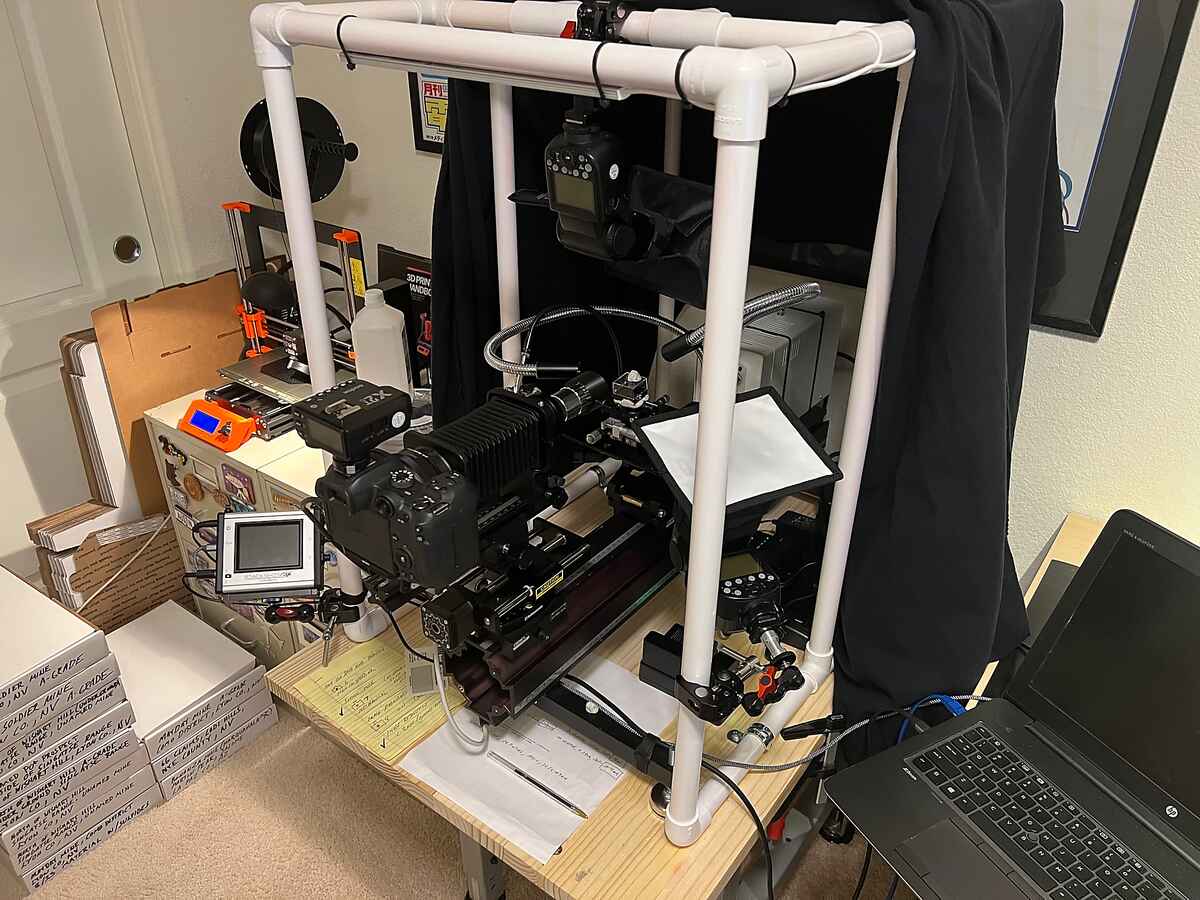
You’ll see that I am using a horizontal setup. I started with a vertical setup (photo copy stand), but I like the convenience of being able to use the viewfinder on the camera. The horizontal setup is also stiffer / less prone to vibration than a vertical setup. The vertical setup is perfectly usable, you just have to allow much more settling time between the stacking rail moving and shooting a frame. Bruce Kelley, who shoots some very fine photos and uses a vertical stand, said in a recent talk that he was using about 5 seconds of settling time between frames. I am using about 1 second.
The base is built on a very sturdy little lab table that I found. I also have concrete floors. On top of that I clamped a thick piece of cutting board style wood that I bought for a few bucks at Home Depot. Taking a tip from a pro-quality macro-photographer on YouTube (Allen Walls), I built a cage around my setup out of PVC tubing. This allows me to clamp my lighting sources (flashes) anywhere I want to around my subject matter. It also has an LED worklight strip attached to the top for illumination, if I am doing heavy teardown and setup. The flashes / lights / reflectors, etc. are clamped to the PVC tubing with readily available photography equipment clamps that you can find for cheap on Amazon.
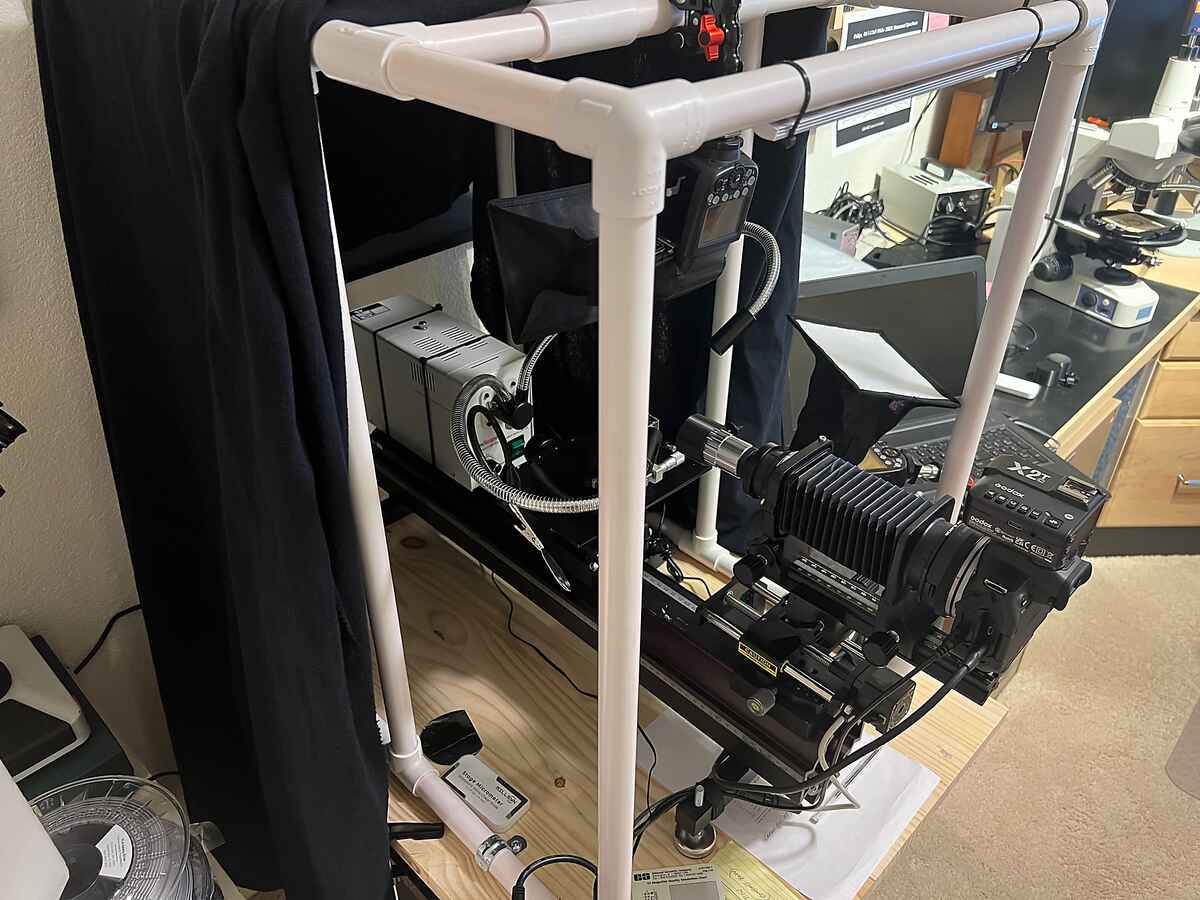
I built this rig on a piece of light bench testing rail that I got from work out of our surplus pile. It is made by a company called Oriel. I don’t even know if they are around anymore, but you can find this kind of thing on eBay if you are interested. You don’t have to go this fancy. You can clamp the stepping rail and the specimen holding apparatus directly to the wooden base.
The fiber optic lighting source in the back of the setup is not used for micro-photography. I use flash photography when I am shooting micros. However, I sometimes shoot thumbnail / macro specimens on my setup, and for that I might use the fiber optic light. The fiber light source is used for modeling. I can look through the viewfinder of the camera using the fiber light source and model the shot. Things like focusing in on the area of interest, getting the right angle, etc. I also use the fiber light to judge which angles cause unsightly reflections. This allows me to set the angles of my flash units.
I am using two Godox speedlight flashes, with a Godox remote unit that controls both of the flashes wirelessly. All these units are relatively inexpensive and available on Amazon. The top flash is the “main” flash, it typically has a longer duration / light output. The side flash is referred to as a “fill” flash and serves to remove hard shadows. Both flashes are independently controllable in terms of duration using the Godox remote unit which mounts in the flash shoe of the camera. I am typically using around 1/64 second on the top flash and 1/128 on the fill flash. Both flashes have heavy diffusion using some folding diffusers readily available on Amazon. I have done a lot of experimentation and this is the most fuss-free setup I have found. The diffusers have both internal and external diffusers (2-layer). That is the main trick to using flash (heavy diffusion).
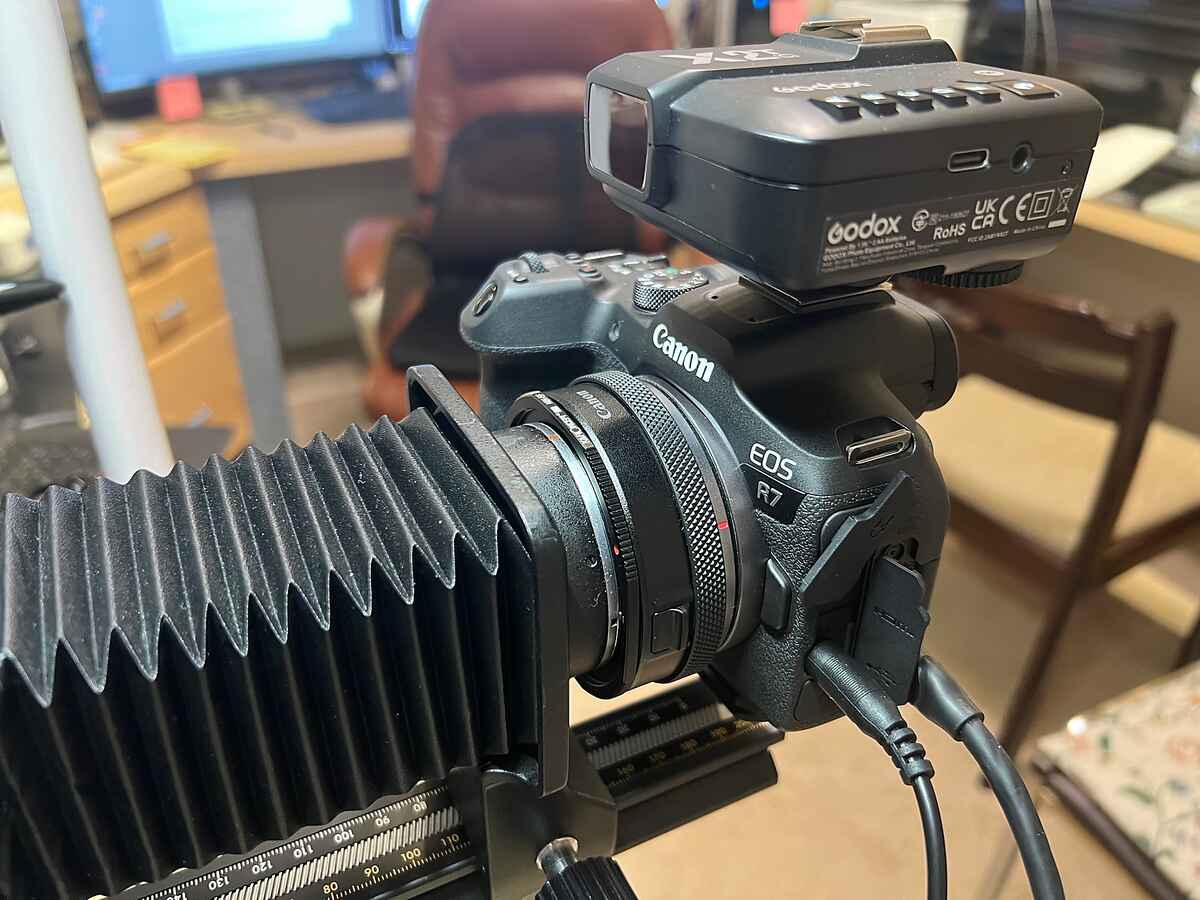
I usually shoot a few test frames after I model the specimen with the fiber optic lights. The camera is set to full manual mode (focus and exposure). For the most part I shoot with an exposure time of 1/250 and an ISO around 200. Try that with a fiber light source! No freaking way! That’s how you get sharp pictures.
I am now using a Canon R7 mirrorless camera. Definitely better than the cheap Canon camera I started with, but also much more complex and very light sensitive. I am using full manual (focus and exposure), but I had to play with a whole bunch of settings in the camera to get the performance I wanted.
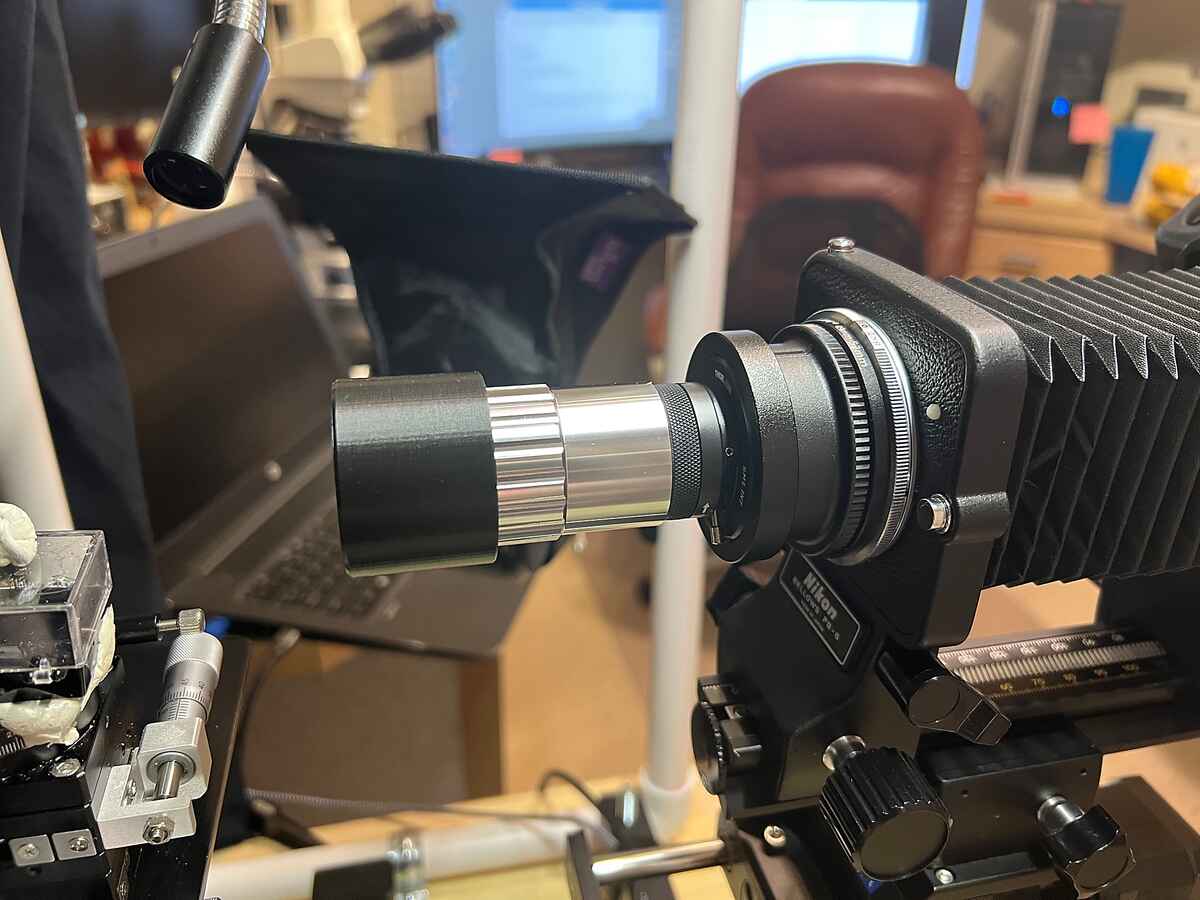
I am using a bellows setup. I wouldn’t go any other way, because it allows you to adjust magnification on-the-fly. Some people are using a fixed photo tube setup. I wouldn’t recommend it. I am using an old Nikon PB-6 bellows that I got on eBay with suitable adapters. Works great. There are better bellows out there (ask Travis, he has one).
I use the Mitutoyo 10x objective for most of my photos (.5 to 5mm FOV). I also have a Mitutoyo 5x that I employ less commonly on micro specimens where I want to show a broad field (5mm to 15mm FOV).
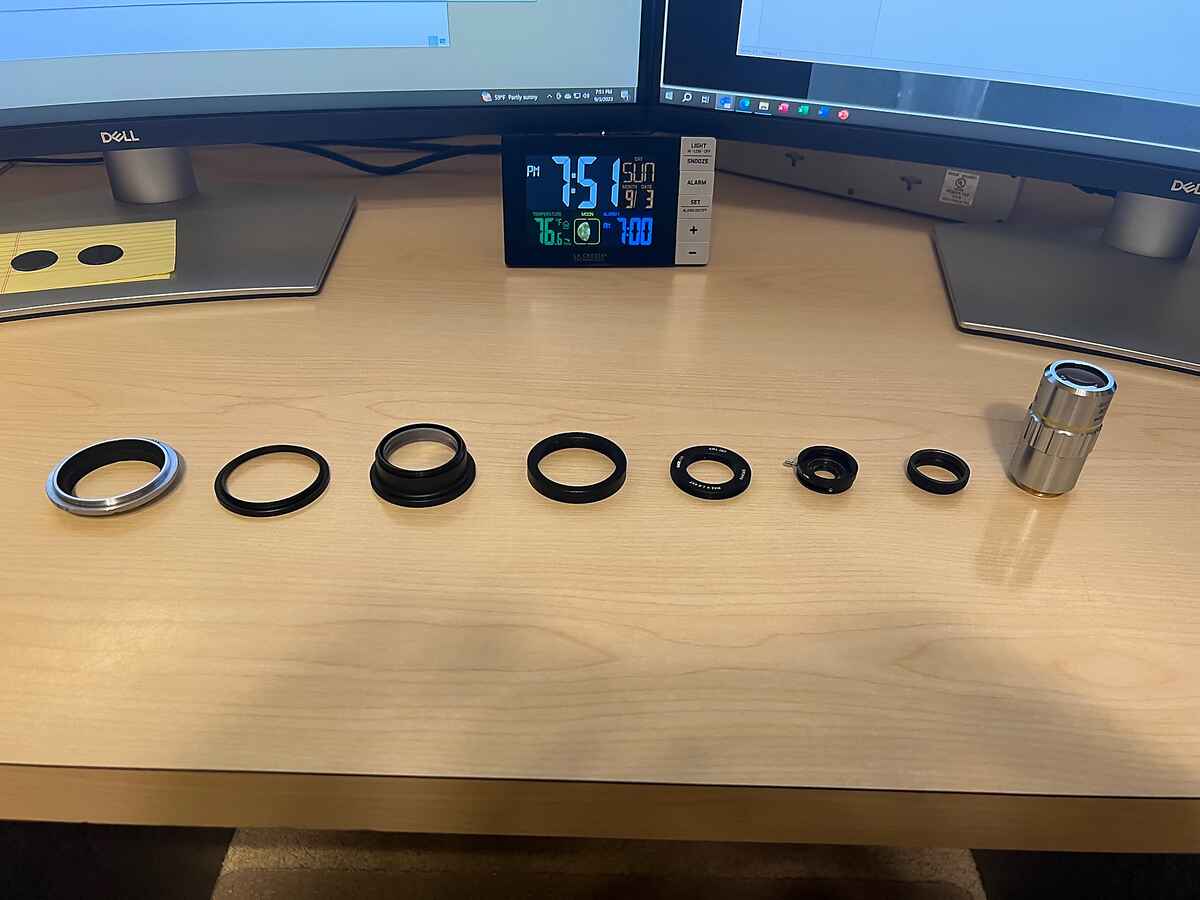
The last image shows the adapters. I took apart my setup and laid it out. Left to right you have:
    Nikon BR2 adapter (Nikon bellows to M52 male).
    52mm female to 49mm male
    Raynox DCR-150 (gets me all the magnification I want in conjunction with a bellows).
    Raynox reversed M42 adapter (this is the hard one to get.  It is a female to female adapter)
    Thor Labs M42 x 1.0 EXT, SM1 INT adapter
    Thor Labs SM1 D12 diaphragm (Adding the diaphragm was a tip from Travis.  It is increases depth of field/sharpness)
    Thor Labs M26 Mitutoyo adapter
    Mitutoyo 10x objective
Tom's Mineralogy Info / tom@mmto.org