Opening it up will void your warranty. If your unit is over a year old, this is not an issue.
Remove the slide on carabiner clip.
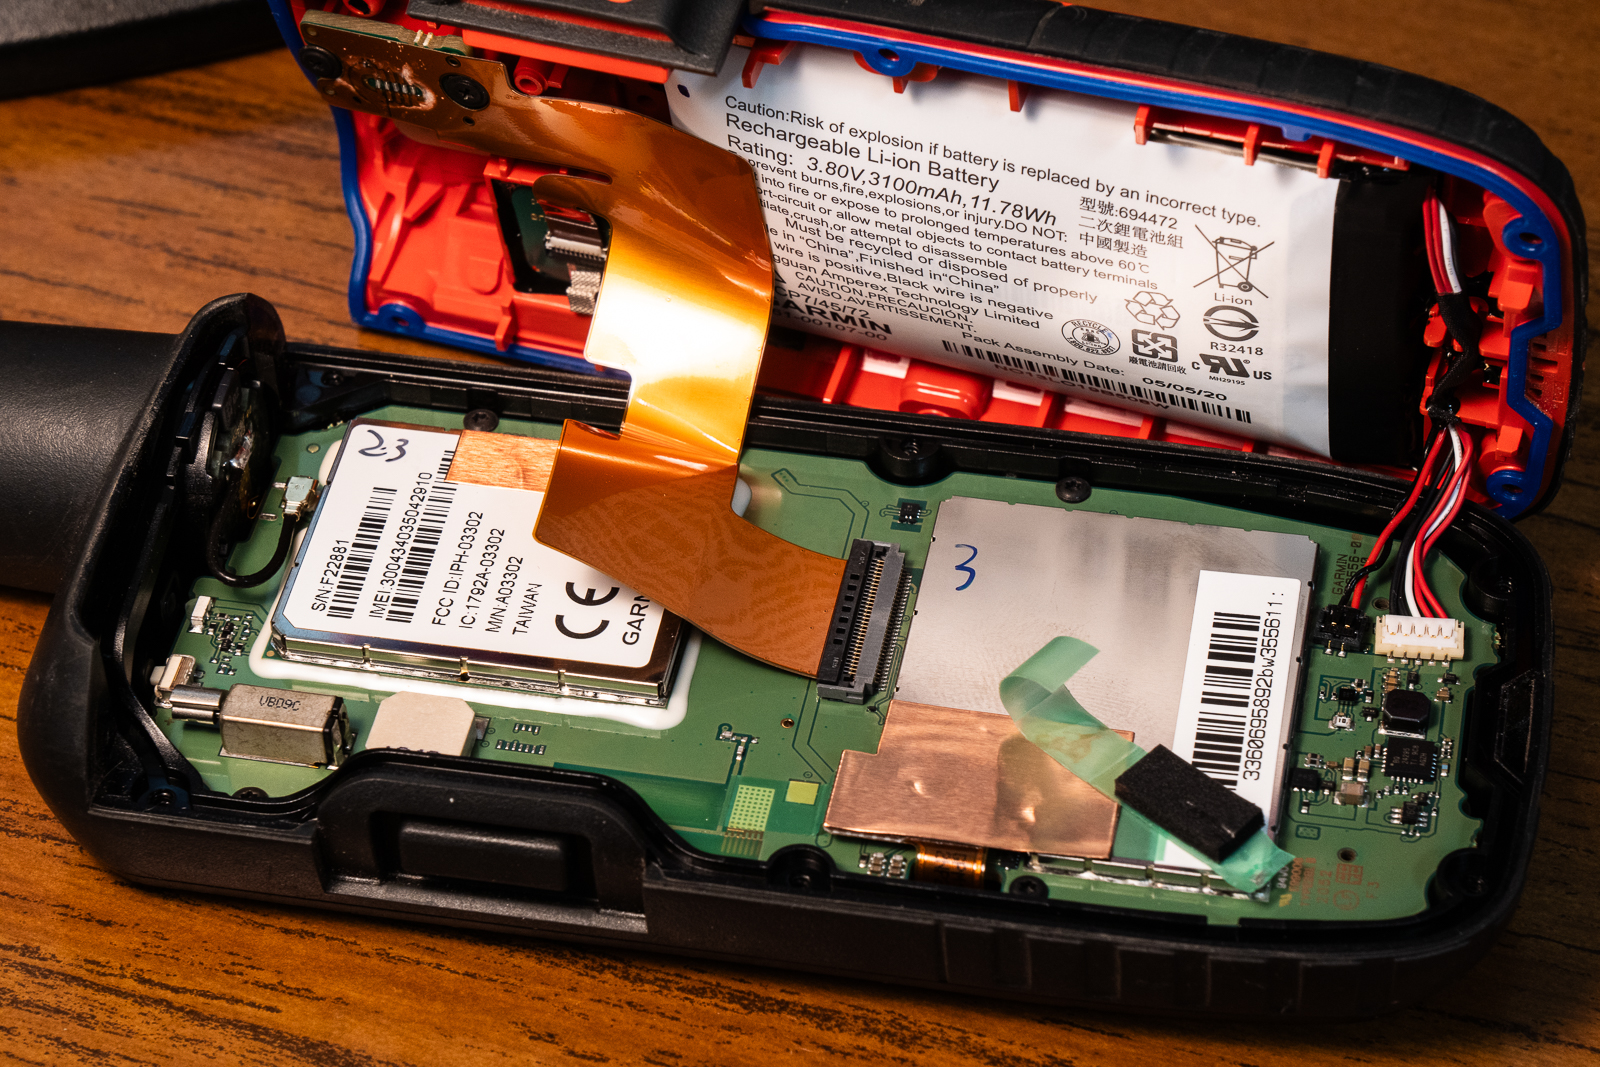
Getting inside is easy. You need a number 6 Torx driver and you remove the 6 obvious screws. They are all the same, so there is no need to remember which goes where. They thread directly into plastic, so use care when replacing them. Care involves turning them first counterclockwise until you feel a click, then doing the usual clockwise rotation to insert and tighten them.
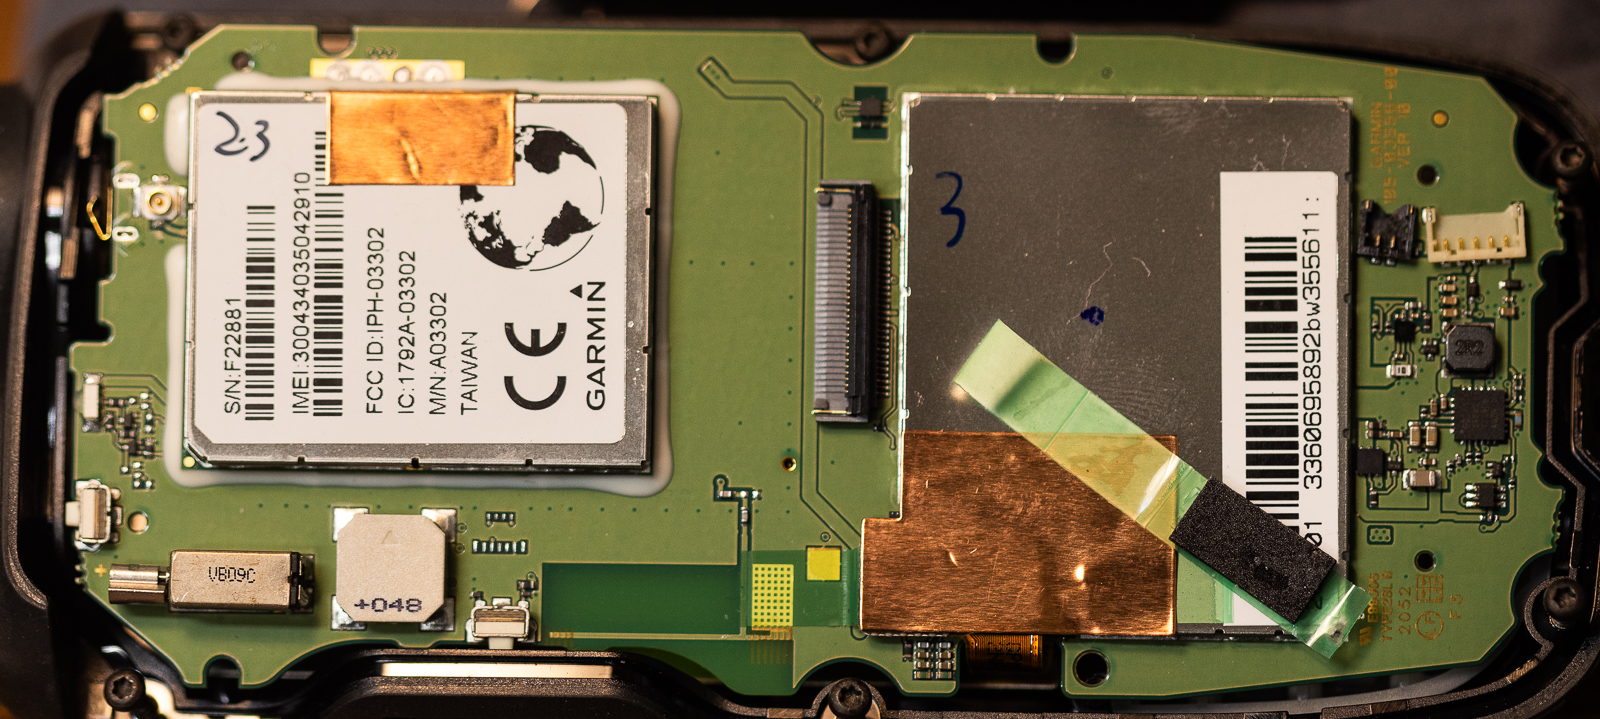
In the above image, note the piece of green tape with a rectangular piece of dense black foam. It is just "parked" where you see it in the photo. It needs to get replaced on top of the two connectors up and right from it when the unit goes back together.
The battery is labeled 3.8 volts, 3100 mAh, 11.78 Wh.
Garmin part 1|CP7|45|72 361-00107-00
Pack Assembly Date 05/05/20
The battery is connected by a cable with 5 wires: 2 black, 1 white, and 2 red.
A second cable with 2 wires (black and red) connects to the PCB next to it, and goes to the charging cradle pins (that nobody ever uses) on the bottom of the 66i and can be ignored.
The battery is firmly glued in place with a black rubbery cement. Removing the battery takes time and patience using a sharp knife to cut through the glue bonds around the edges. Using a sharp knife next to this puffed up battery does make me nervous, but I am careful and nothing bad happens.
It was quite a battle, but I now have the battery out. The main issue is not visible. Some kind of extremely tenacious double sided tape behind the battery was holding it in place. The trick is to use some muscle and pry on the battery with a screwdriver. Listen for crackling noises as the tape lets go.
Here is an article (in German) that talks about replacing the battery in a Garmin 66sr. It has the exact same 361-00107-00 battery.
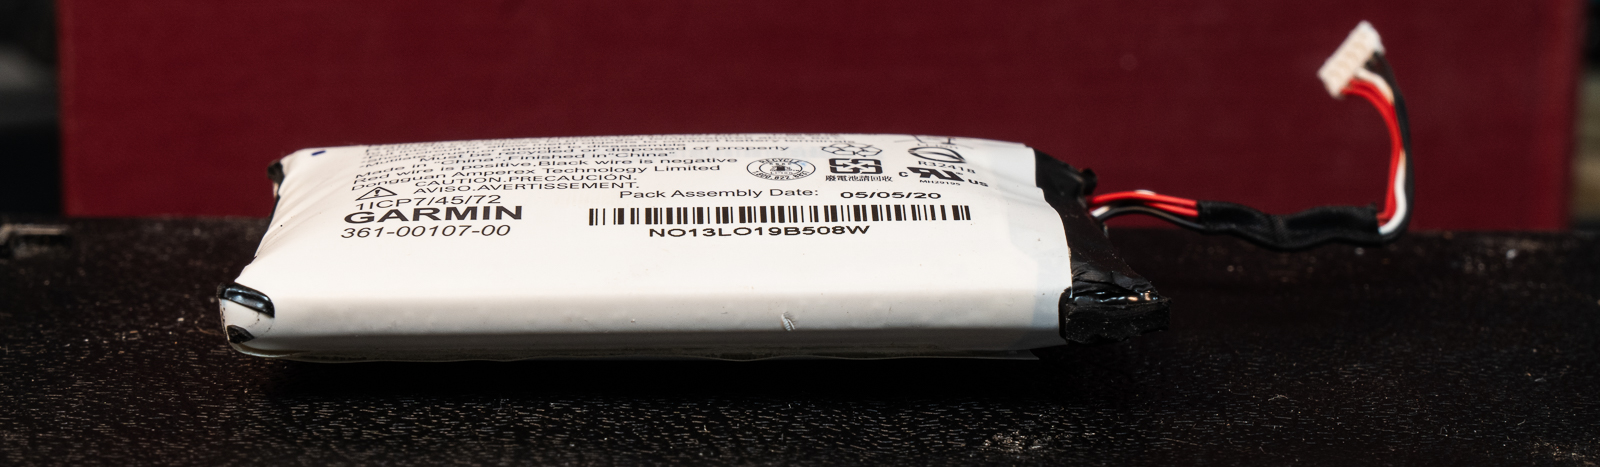 Does that battery look a bit puffed up to you?
People say that if you send a unit in to them for battery replacement they will exchange yours for a refurbished unit. I don't know if the cost would be less than the "half of full price" they charge in such cases or just how that would all sort out. Half of retail is $300, which would be hard to swallow for a battery replacement.
I went to Amazon. Ebay sellers also have 361-00107 batteries for about $16.
I ordered this for $12:
I also ordered one of the Ebay batteries with different branding, hoping to somehow test and qualify these batteries before installing them. I am expecting low quality cells from China, but I might be surprised. And maybe they aren't all the same.
I also contemplate buying a cell with some kind of reputation for quality and soldering the connector from my puffed up battery to it. So far I have not located a suitable candidate.
I could try these. I have no idea about the quality, but you get a 5 pack of these for $28. They would need a new connector and perhaps the 0.39 inch thickness would be too thick. They are 2.56 by 1.38 by 0.39 inches.
The Garmin battery is 2.8 by 1.7 by ??.
However I think that the battery itself was probably not acting right. The 66i saw it as nearly fully charged, but it could not deliver current for more than an hour or two. Perhaps hiking with it in near 100 degree temperatures, as is the general rule for me, causes additional problems.
The unit would sometimes power up when given power from USB. Perhaps this was because the battery had given up and then USB power did the trick.
Apparently the battery icon in the 66i is misleading and useless with a really screwed up battery like this.
Consider having a metal bucket with sand handy when you start.
Use plastic tools (I did not).
Do not use sharp tools (I did).
Clear flammable materials (...)
Wear protective clothing. (nope, just shorts and T-shirt)
Work in the open air if possible (I did not)
Place in a fireproof container once removed.
I also read the recommendation that you should not swallow a swollen battery, so put that idea out of your mind.
Here is what you see when you remove 4 Torx T5 screws and lift up the circuit board.
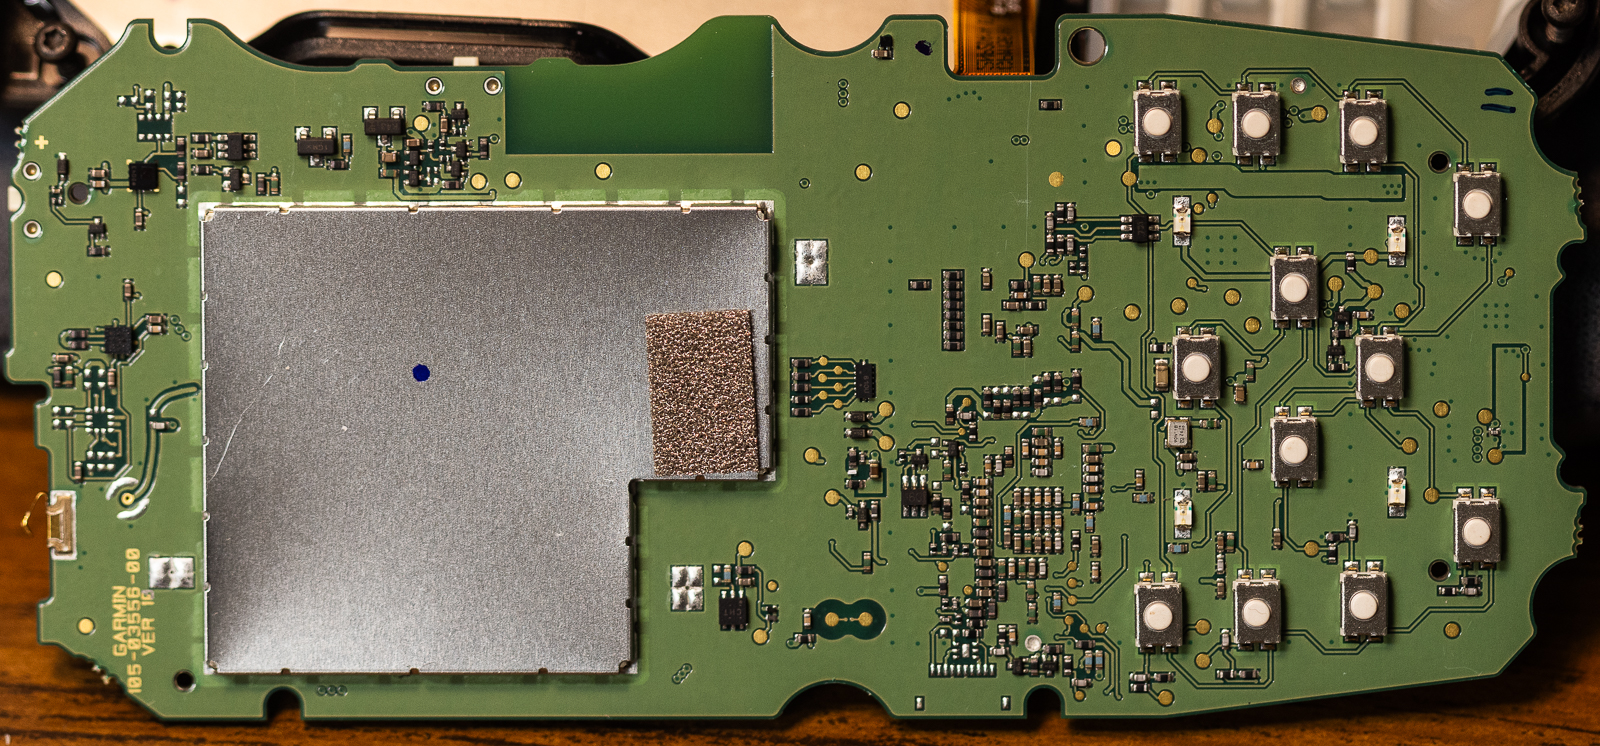
All components of interest are inside the shielding cans and I am not curious enough to unsolder them just to take a peek. The above image (with buttons) shows an array of 6 contact points that just might be a JTAG connection exposed.
Since I am hopful that a new battery will restore this unit to full function, I am not going to do any poking around. I would if the unit was hopelessly trashed.
Here is a close view of the battery connector.
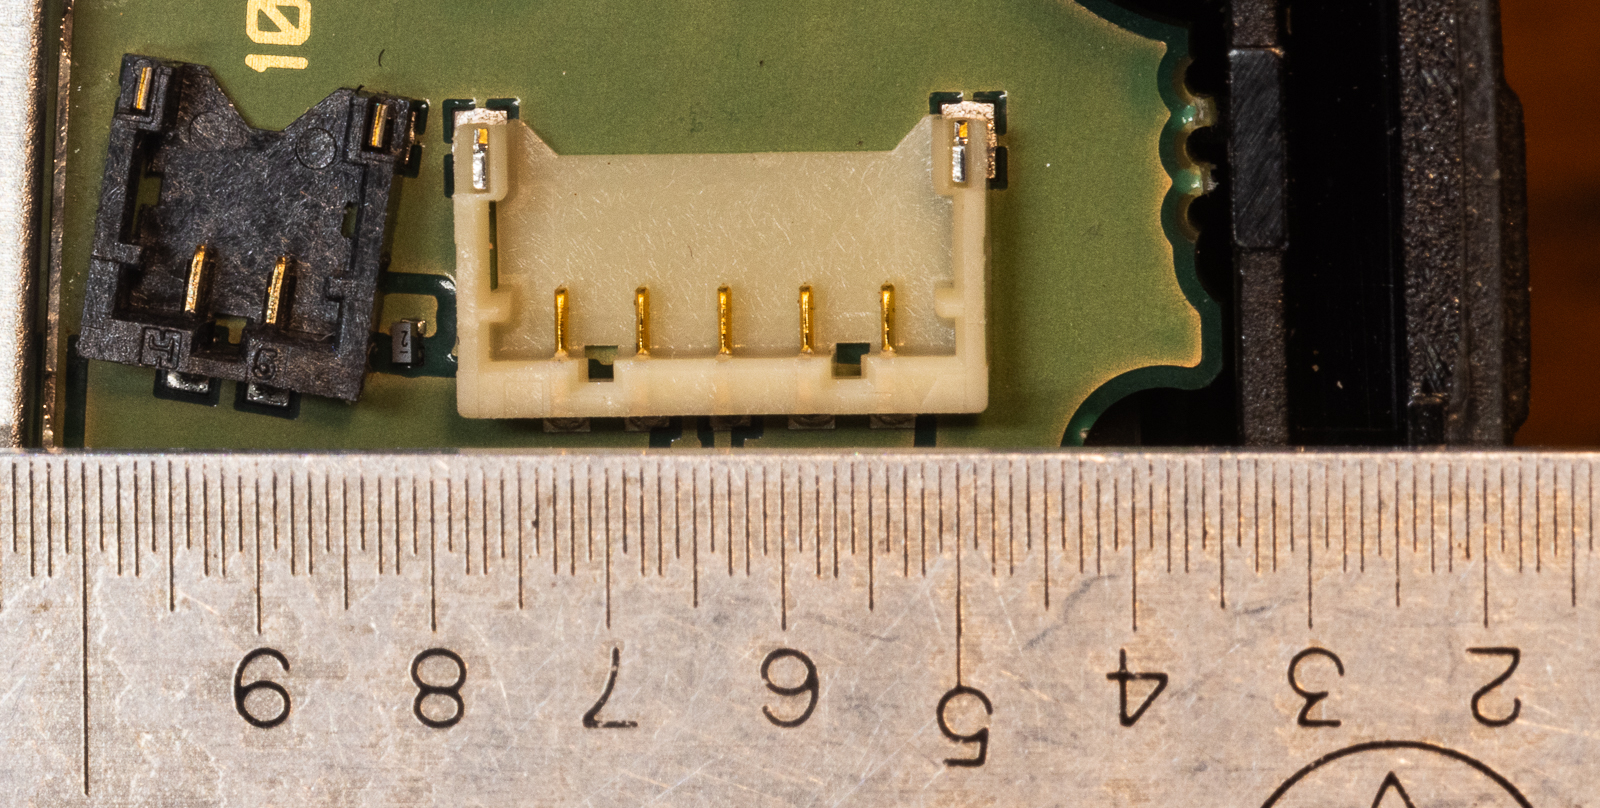
The ruler is in inches (and tenths and hundredths thereof). It looks to me like the battery connection pins are 0.05 inches apart. If they were 1mm apart, that would be 0.039 inches. They are definitely not 0.039 inches.
A meter shows that on each connector, the pins on the left are ground. The positive (right) pin on the black connector makes no connection to the white connector -- which is as it should be. Whatever voltage the charging cradle provides goes to the charging circuit in the 66i which passes it on to the battery.
Once the 66i powers up, I hold the power button down to get to the charging window. It shows the battery 73 percent charged as shipped. As I write this, after about 20 minutes, it is up to 83 percent.
I'll also note here than plugging in the big brown ribbon flex cable was quite easy. It has little ears that index it into position, then you just use a finger to clamp the lid down.
After about an hour the battery charge shows as 97 percent. I touch the battery and it seems cool, which is good.
It lingers a long time at 99 percent, but the battery stays cool.
Tom's backpacking pages / tom@mmto.org